Quick Start Guide
Get your salon live on Glambook in 5 steps. After creating your salon, you'll see a Launch Checklist on your dashboard that guides you through each step until you're ready to go live.
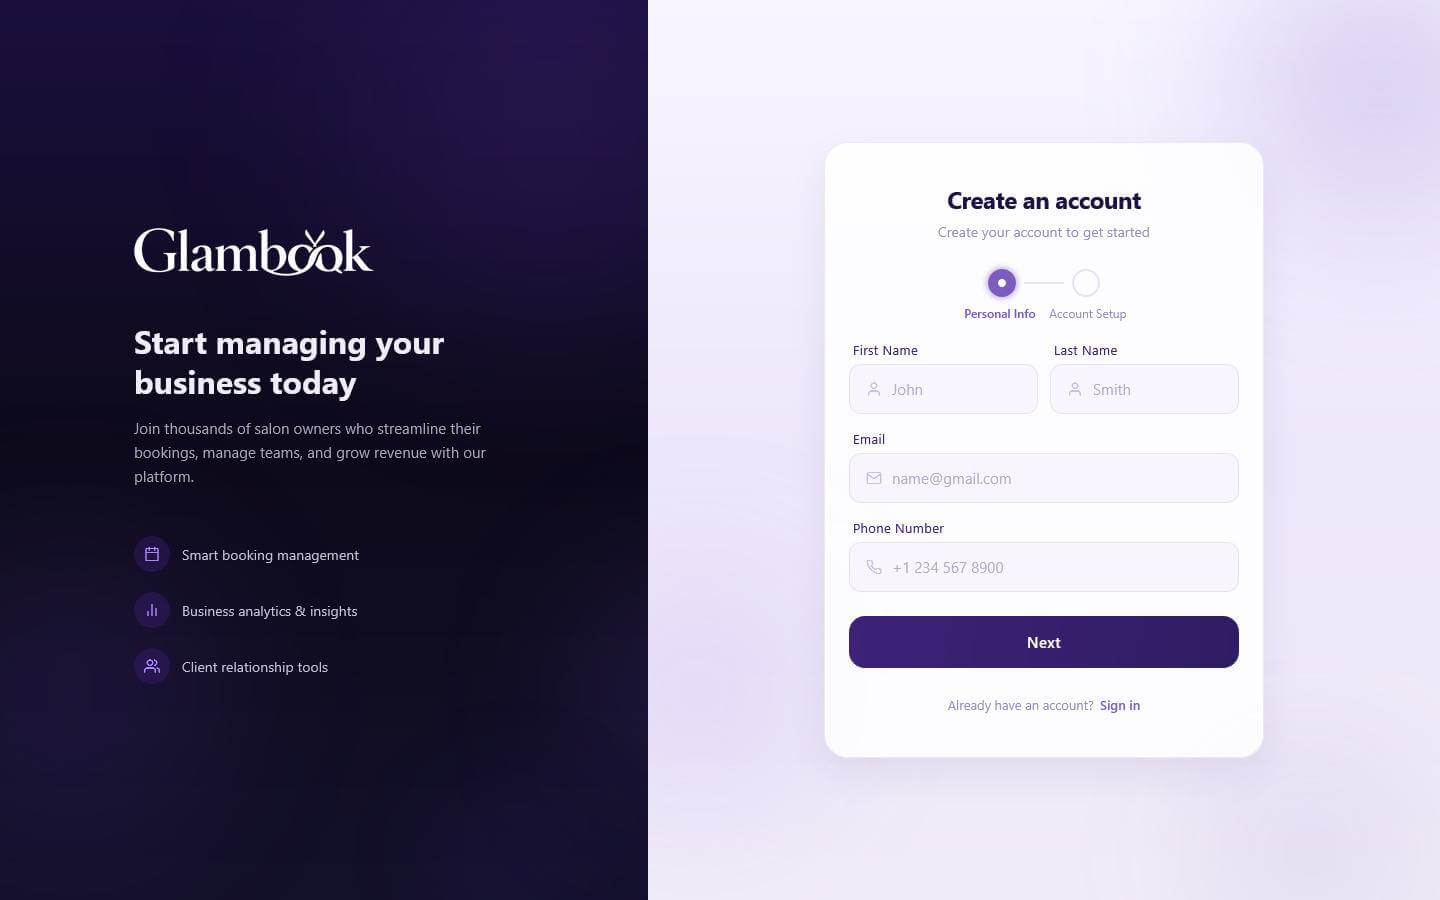
Create Your Account
- Go to admin.glambook.lk/register
- Fill in your name, email, username, and password
- Verify your email with the code sent to your inbox
- Log in with your credentials
See Registration for full details.
Create Your Salon
- After logging in, you'll be prompted to create your first salon
- Tap Add Facility (or go to Facilities > Add)

- Fill in your salon details — name, location, phone number, email, and description
- Upload photos of your salon
- Select your service type (Salon or Spa)
- Add your amenities (parking, Wi-Fi, AC, etc.)
- Set your operating hours for each day of the week
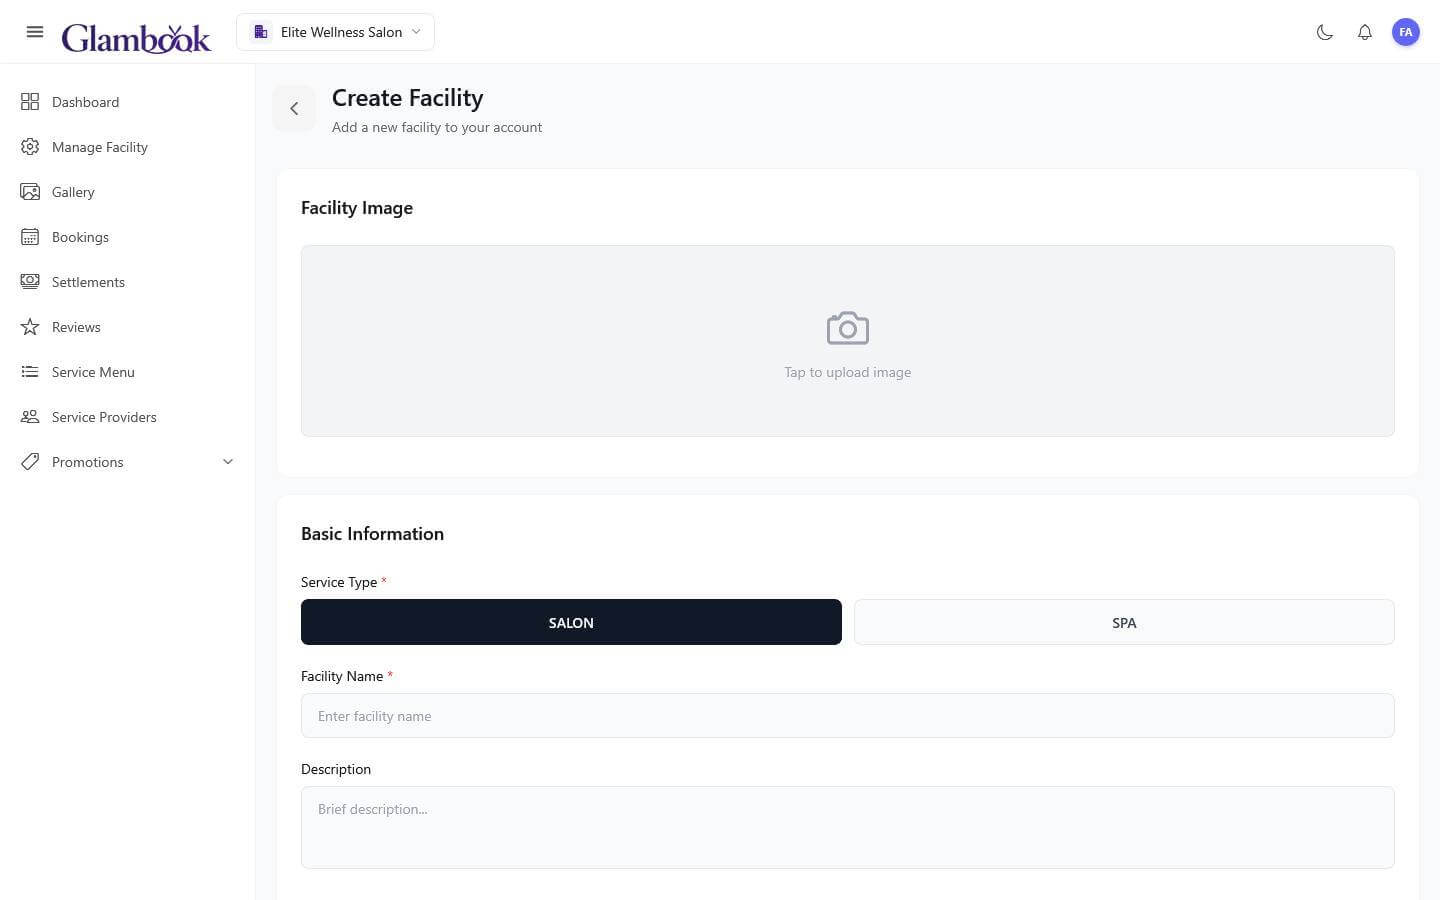
- Save your salon

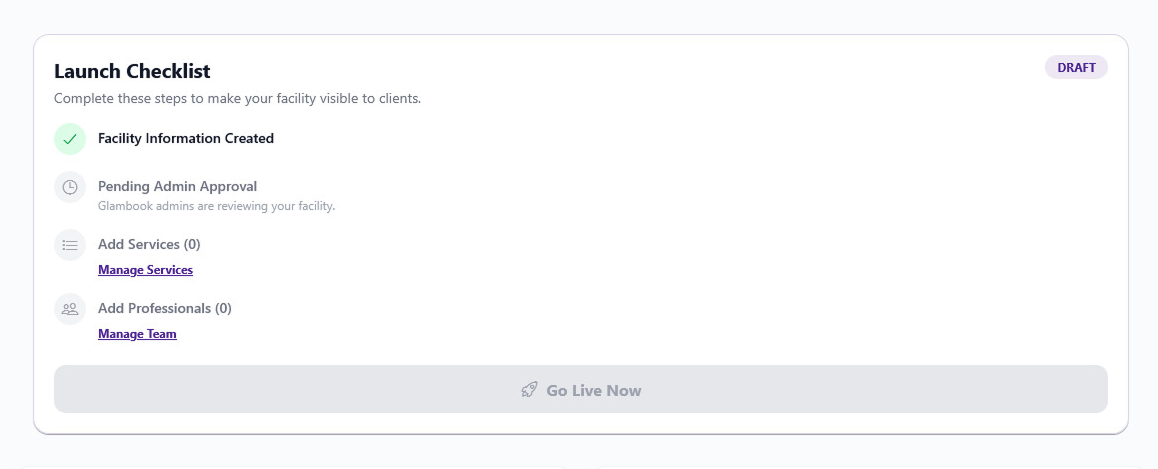
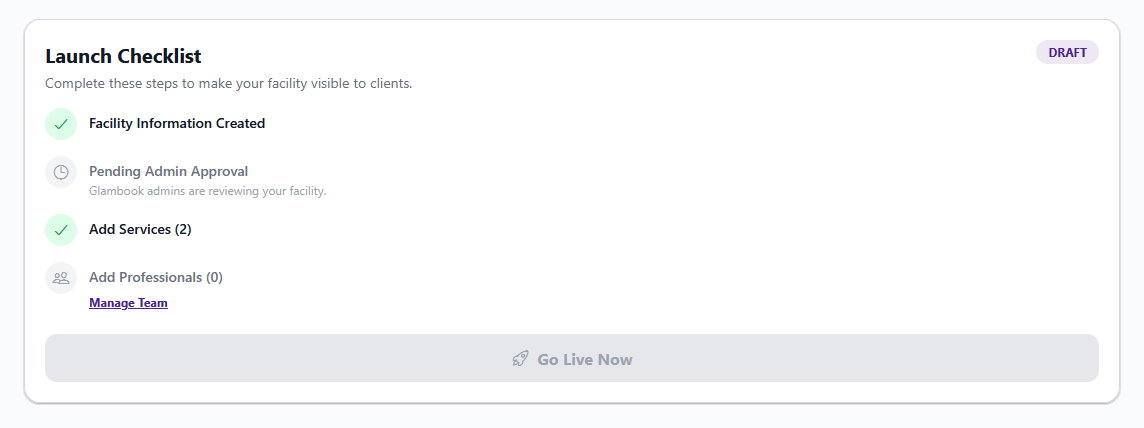
Once saved, your salon is created with Draft status and the Launch Checklist appears on your dashboard. This checklist tracks everything you need to complete before going live.
See Creating a Salon for full details.
Wait for Admin Approval
After creating your salon, it needs to be reviewed and approved by the Glambook team before you can go live.
- Your checklist will show "Pending Admin Approval" with the message "Glambook admins are reviewing your facility"
- You'll be notified once your salon is approved
- While waiting, you can get ahead by adding your services and staff (Steps 4 & 5)

Approval typically happens quickly. If your salon is rejected, you'll see a notification with the reason — update your details and resubmit.
Add Your Services
You need at least 1 service before you can go live. You can start adding services while waiting for admin approval.
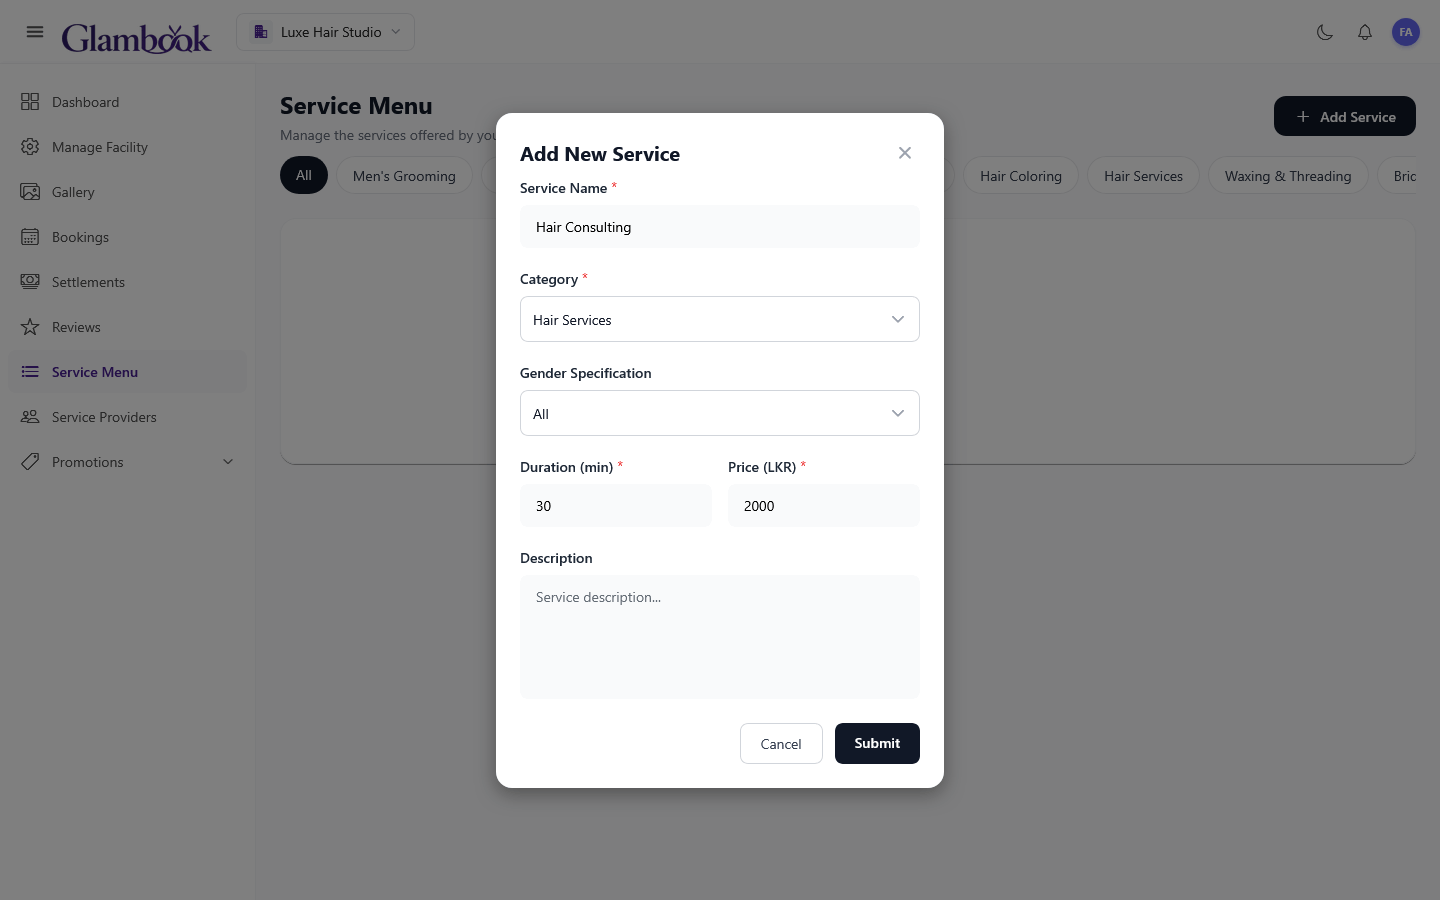
- Go to the Service Menu tab (or tap Manage Services on the checklist)
- Tap Add Service
- Enter the service name, select a category, set the duration (in minutes), and set the price
- Save the service
- Repeat for all services you offer (e.g., Haircut, Hair Coloring, Facial, Manicure)
Your checklist will update to show "Add Services (1)" as you add services.
See Adding Services for full details.
Add Professionals & Set Schedules
You need at least 1 professional before you can go live. You can start adding staff while waiting for admin approval.
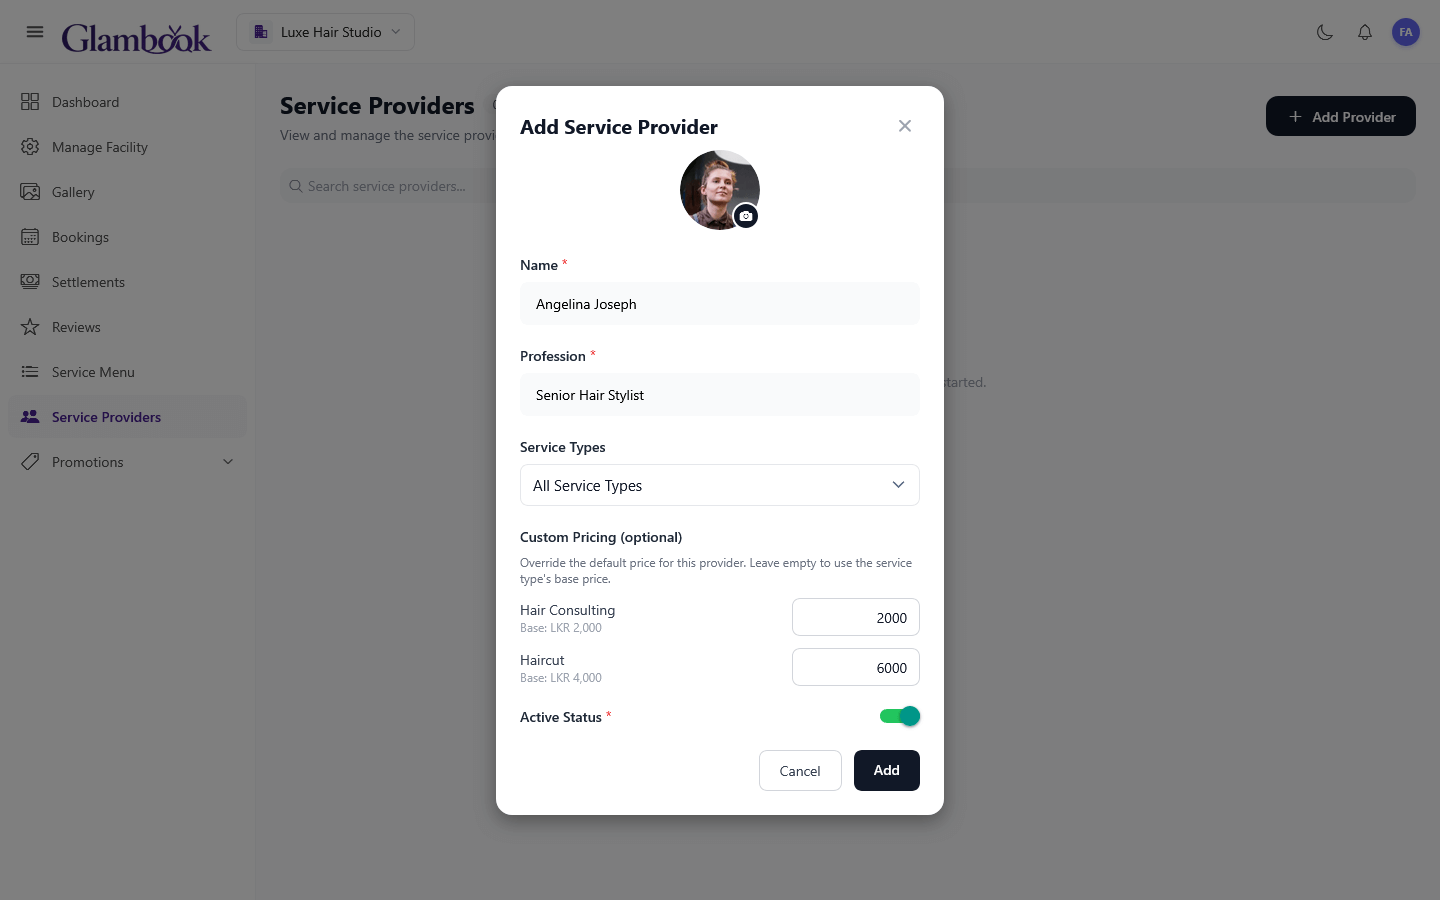
- Go to the Service Providers tab (or tap Manage Team on the checklist)
- Tap Add Provider
- Enter the provider's name and profession (e.g., "Hair Stylist")
- Assign the services they offer — you can set custom pricing per provider if needed
- Save the provider
- Tap the provider's menu and select Manage Shifts
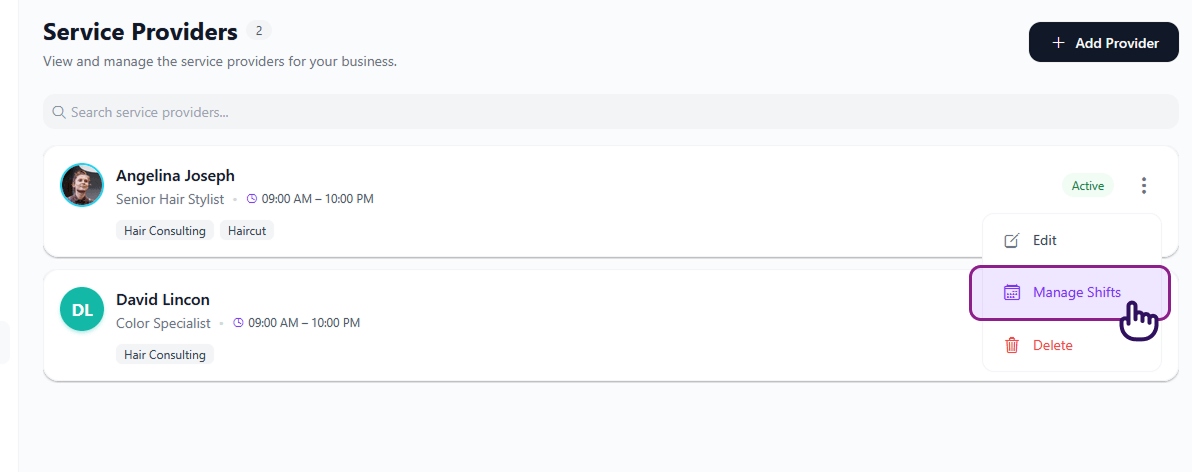
- Set their working hours — choose recurring weekly shifts or single-day schedules
- Mark any days off as needed
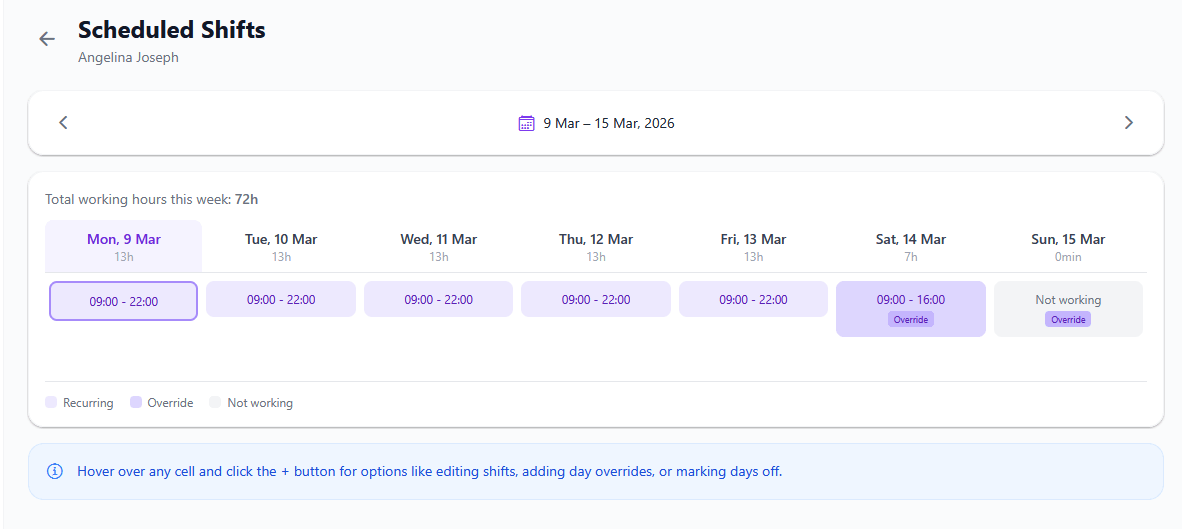
See Adding Staff and Managing Shifts for full details.
Go Live!
Once all checklist items are complete — your salon is approved, you've added at least 1 service and 1 professional — the Go Live Now button becomes active.
- Go to your Dashboard
- Review the Launch Checklist — all items should be checked off
- Tap Go Live Now
- Your salon is now live on Glambook!
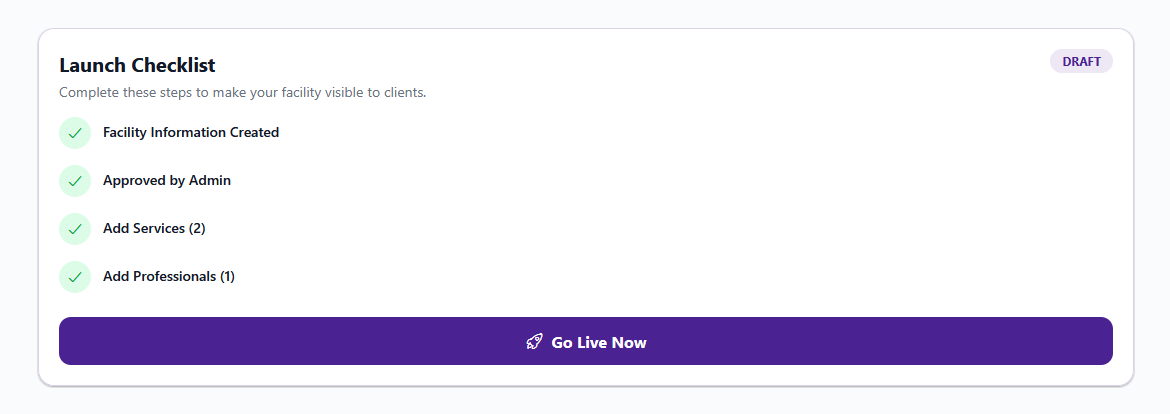
The Go Live Now button stays disabled until all three requirements are met: admin approval, at least 1 service, and at least 1 professional.
See Publishing Your Salon for full details.
You're Live! 🎉
Clients can now find your salon, browse your services, and book appointments. Here's what to do next:
See today's bookings, upcoming appointments, and provider availability
Confirm or reject client booking requests (manual mode)
Create discounts to attract more clients during slow periods
Configure your payout account to receive earnings
Set up your bank details early so you're ready to receive payouts from your first month.